
4. Create an API key
Open Token keys
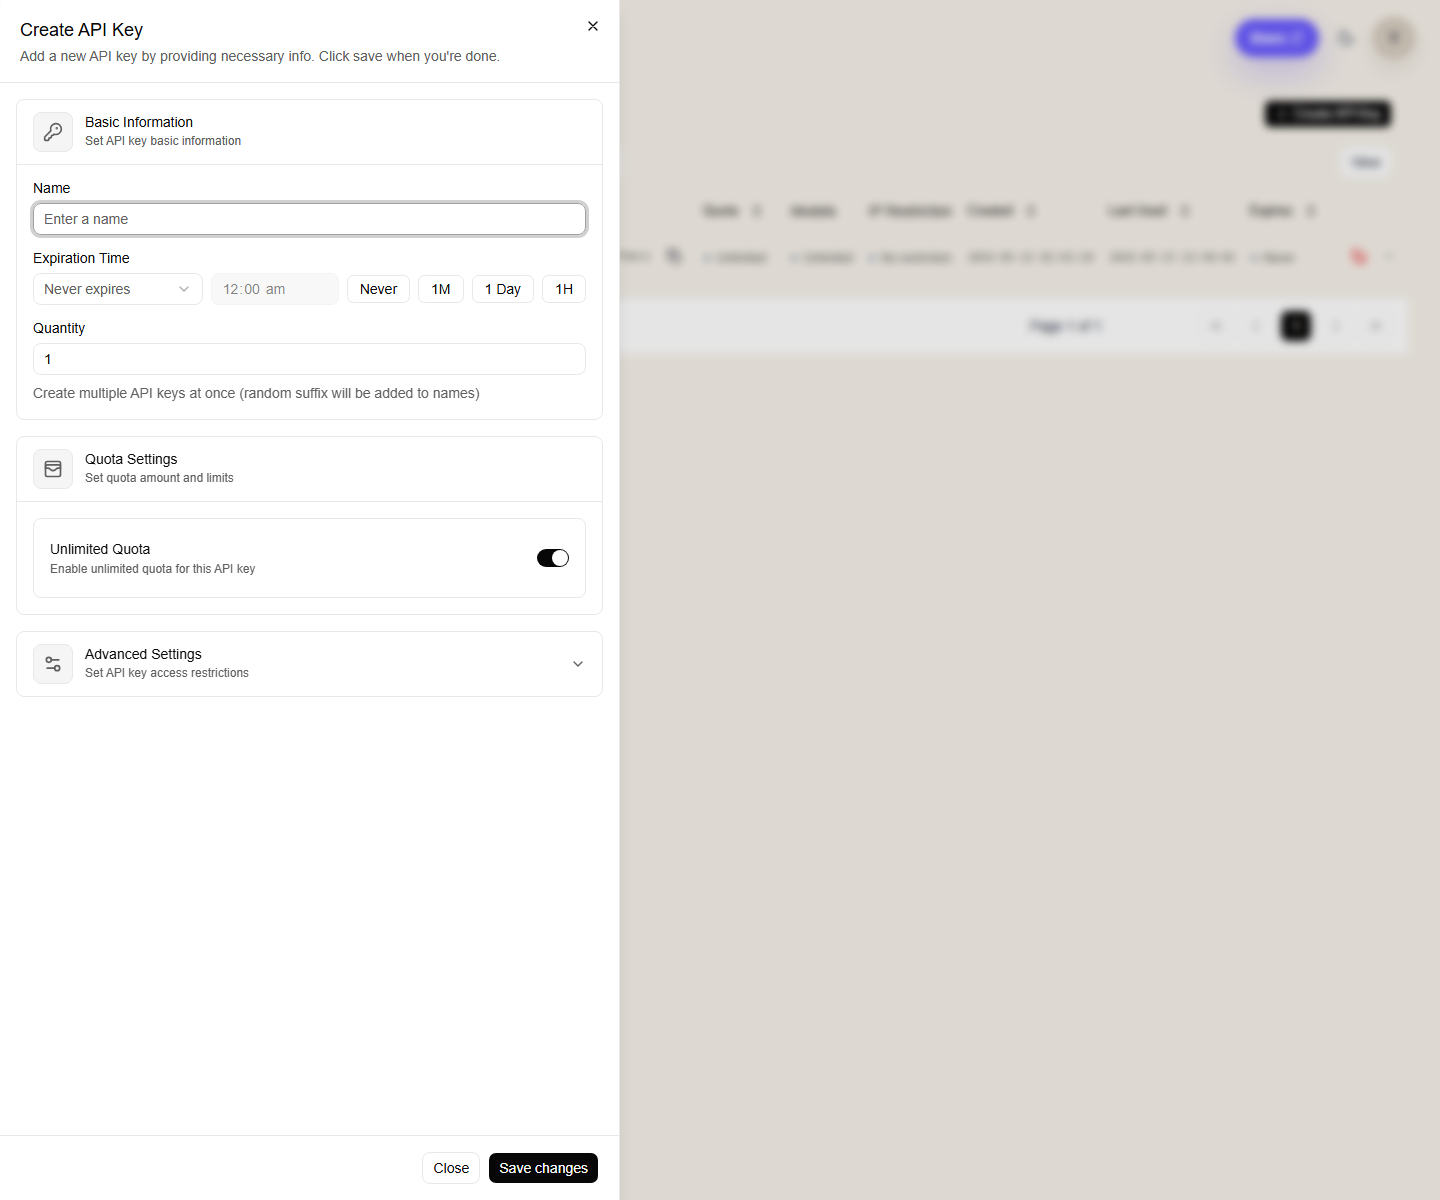
After adding balance, open Token keys from the left sidebar and click Create API Key.
Fill in the main fields
Name
Use a clear name such as:
claude-code-laptopcodex-desktopgemini-cli-server
One key per app or machine makes later rotation much easier.
Expiration Time
If you want a long-lived key, keep the no-expiry option.
If you are sharing temporary access, set an expiry time on purpose instead of leaving the key open forever.
Quantity
Leave this at 1 unless you explicitly want multiple similar keys created at once.
Quota Settings
If you want the key to use the full account balance, leave Unlimited Quota enabled.
If you want a strict test budget, disable unlimited quota and set a cap.
Advanced Settings
Use advanced restrictions only when you actually need them.
If you do not have a specific reason, keep the default open settings.
Common Issue
If a request fails with model unavailable, no permission, or similar errors, check the key settings first.
In many cases, the model is fine and the key is the part blocking the request.
Recommended check order
- confirm the key is enabled
- confirm the key has not expired
- check whether quota limits were set too low
- if you enabled model restrictions, confirm the requested model is in the allowed list
- confirm the account still has balance
Key safety
- Do not paste your key into public chats, screenshots, issue trackers, or frontend code.
- Create separate keys for separate apps.
- Rotate a key if it appears in logs, screenshots, browser extensions, or a shared machine.
- Delete old keys you no longer use.
Next step
Continue to 5. Check your environment.